8 min read
How to Make Receipts for Your Business
A practical guide to issuing customer receipts as a business: the fields every receipt needs, how to number and store them, and the fastest way to make one.
- How do I make receipts for my business?
- Put your business name and contact at the top, give the receipt a unique number and date, itemize what was sold with prices, show the subtotal, tax, and total, and note how the customer paid. Receipt Caker lays out these fields and totals the items automatically, so you can make a consistent business receipt in a minute and export it as a PDF or image.
What a business receipt has to show
A business receipt is your customer's proof of purchase and your record of the sale, so it has to identify both sides of the transaction and the money that moved. That means your business name, address, and a way to reach you at the top; the customer's name where relevant; a unique receipt number and the date paid; a line for each item or service with its price; and a clear subtotal, tax line, and total. The payment method closes it off.
Consistency is what makes these useful at tax time. A receipt that follows the same layout every time is easy to file, easy to reconcile against your bank, and easy for an accountant or auditor to read. Receipt Caker keeps the fields and the totals in the same place on every receipt so your records stay uniform.
Give the customer their copy at the point of sale and keep your own. A receipt only does its second job — as your income record — if you hold onto a duplicate, whether that means printing a pair or saving the same PDF twice. Both sides walking away with the identical document is what a clean set of business records is built on, and it removes any later argument about what a receipt actually said or which sale it belonged to.
Receipt or invoice — which to give
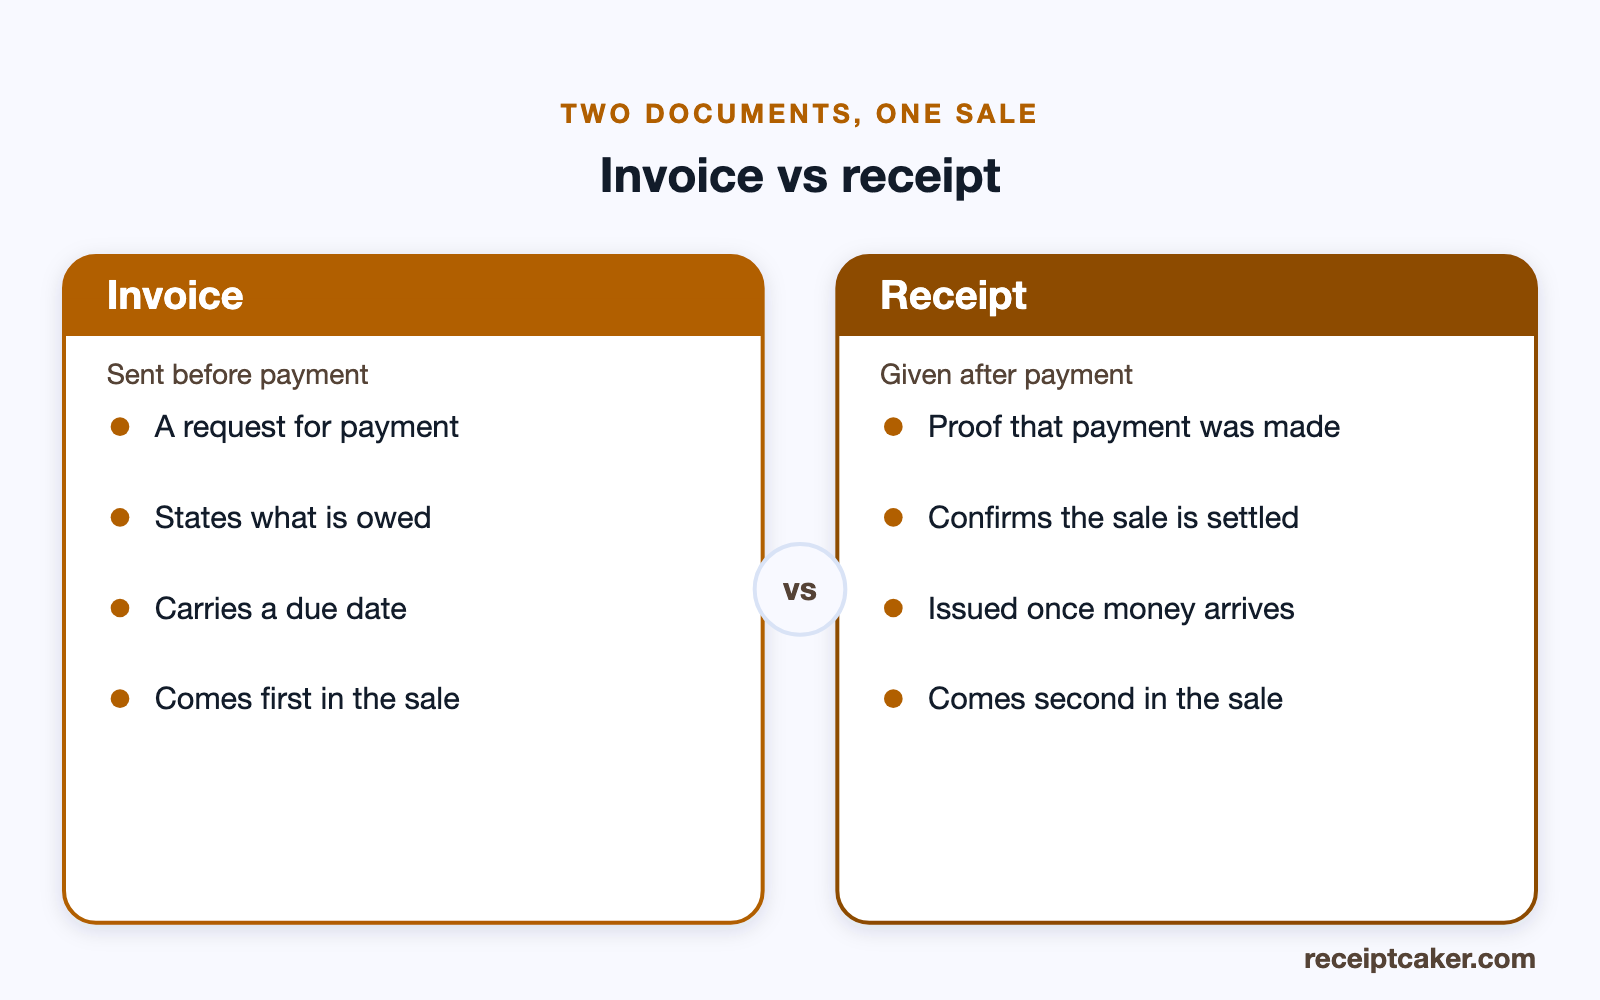
The two documents get confused, but the difference is simple and it decides which one you issue. An invoice is a request for payment: you send it before you have been paid to tell a customer what they owe and by when. A receipt is proof of payment: you issue it after the money arrives to confirm the sale is settled. Many jobs use both — an invoice to get paid, then a receipt once the customer pays.
For an over-the-counter sale where payment and handover happen together, you usually skip the invoice and give a receipt at checkout. For work billed after the fact, you invoice first and follow up with a receipt. Getting the two straight keeps your books clean and stops a customer treating a request for payment as though it were proof they already paid.
Numbering and keeping them in order
Give every receipt a unique number that runs in sequence — 0001, 0002, and so on, or a dated scheme like 2026-045. A sequence lets you spot a gap, look a sale up quickly, and tie a receipt to the matching entry in your books. It also signals to a customer that you run an organised operation rather than scribbling amounts on a pad.
Store a copy of each receipt as you issue it. A folder of PDFs, named by number and date, is enough for most small operations and survives far better than thermal paper, which fades within months. Keeping the copy at the moment of sale, rather than reconstructing it later, is what makes the record trustworthy.
Sales tax on a business receipt
If you are registered to collect sales tax, the receipt should show the tax as its own line rather than folding it into the item prices, labelled with the rate you applied. The customer can then see exactly what they paid in tax, and your books separate the tax you owe from your actual revenue. The correct rate depends on where the sale happened, since US rates combine state and local portions.
Getting the tax line right the first time saves you unpicking it later. Receipt Caker applies a rate you enter to the whole subtotal and shows the tax and grand total instantly, and the sales tax calculator handles the rate itself if you are unsure of the combined figure for a location.
Put your brand on every receipt
A receipt is a small but frequent touchpoint with your customer, so it is worth making it look like it came from you. Your business name, logo, and a consistent layout turn a plain slip into something recognisable, which reads as more established and makes the receipt easy to match to your business among the many a customer collects.
Branding also ties your paperwork together. When your receipts, invoices, and estimates share the same mark and structure, they read as one identity rather than a scatter of unrelated files. A text business name is enough to start; adding a logo image lifts it further, and keeping the same look across every document is what makes the branding do its work.
How long to keep business receipts
Your issued receipts are the backbone of your income records, so keep a copy of every one. In the US the IRS can generally look back three years, which makes three years the safe minimum for holding both the receipts you issue and the ones you receive; some situations run longer, and many businesses keep records for six or seven years to be safe. For expenses, the IRS does not require a documentary receipt below $75, but keeping one above that threshold is expected.
Digital storage makes this painless. A folder of PDFs, named by number and date and backed up, satisfies the retention rules without a filing cabinet and, unlike thermal paper, does not fade to blank right when you need it. Reconciling against your bank and handing a clean set to an accountant becomes a matter of opening a folder.
The fastest way to issue one
You can build receipts in a spreadsheet or a word processor, but you end up re-typing your business details, re-checking formulas, and fighting the layout on every sale. A dedicated generator holds your details and structure, so each receipt is a matter of entering the items and the amount, and the total is worked out for you.
Fill in the fields, let the tool total the items and tax, then download a clean PDF or image to hand over, email, or file. Everything is composed in your browser, so nothing about the sale is uploaded anywhere — you get the document and keep the record. Issue one for every genuine sale and your income trail builds itself.
Steps at a glance
- 1Add your business details. Put your business name, address, and contact at the top so the customer knows who they paid.
- 2Number the receipt and date it. Give every receipt a unique number and the date of payment so your records stay in sequence.
- 3List what was sold. Itemize each product or service with its quantity and price.
- 4Show subtotal, tax, and total. Total the items, add any sales tax on its own line, and show the amount paid.
- 5Record the payment method. Note whether the customer paid by cash, card, or transfer, then export and send the receipt.