8 min read
How to Scan Receipts for Taxes
A step-by-step method for scanning paper receipts into clean, legible files that back up your tax deductions and survive an audit.
- How do I scan receipts for taxes?
- Receipt Caker can rebuild a legible PDF of a genuine receipt whose paper has faded, but for the rest, sort your paper by deductible category, then scan each one flat and in good light so the date, seller, and total are legible. Save every scan as a PDF named by date and seller, note the business purpose, and file it by tax year so your deductions stay documented.
Why scanning beats keeping paper
Most receipts are printed on thermal paper, and thermal ink fades — sometimes within months, often within a year or two of heat and light exposure. A deduction backed by a blank slip is a deduction you cannot defend. Scanning captures the receipt while it is still readable and locks that record in place.
Tax authorities in most countries accept legible digital copies of receipts, so a good scan carries the same weight as the original for supporting a claim. Digital copies also take no drawer space, cannot be lost in a move, and can be searched in seconds, which turns tax season from a paper hunt into a quick export.
Sort before you scan
Do the thinking on paper first. Spread your receipts out and split them into the categories you will actually claim — travel, supplies, meals, equipment, and so on. Discard anything that is clearly personal and not deductible so you are not scanning noise. Sorting first means that once files are digital, they drop straight into the right folder.
As you sort, jot the business purpose on receipts that need it. Many tax rules require you to record why an expense was incurred, not just how much it cost, especially for meals and travel. Capturing that reason now, while you remember the trip or the client, is far easier than reconstructing it a year later.
Get a clean, legible scan
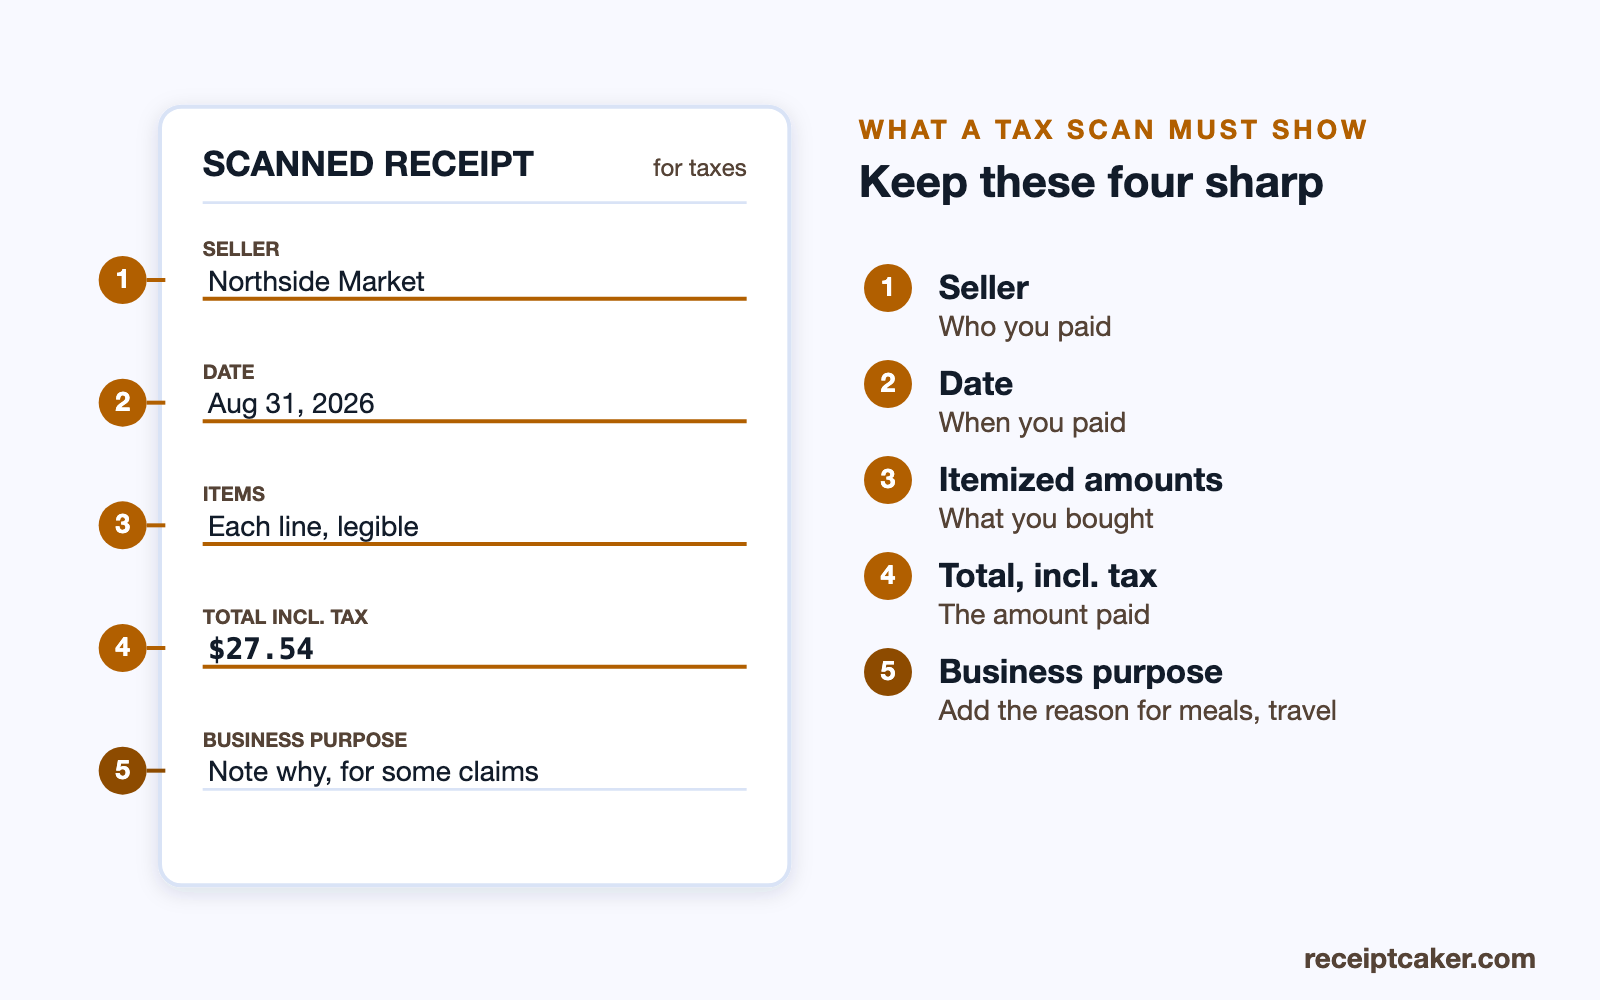
Lay the receipt flat on a plain, contrasting surface and light it evenly — a bright window or a desk lamp with no harsh shadow. Fill the frame with the receipt and hold the phone parallel so the text is not skewed. Before you move on, zoom in and confirm the four things that matter are sharp: the seller, the date, the itemized amounts, and the total.
Save the result as a PDF rather than a raw photo, since PDFs print reliably and stay readable across devices and years. Name each file by date, seller, and amount so it sorts chronologically and turns up in a search. Consistency here is what makes a folder of hundreds of receipts usable rather than a dumping ground.
Scanning a backlog at once
If a year of receipts has already piled up, do not try to scan them perfectly one evening. Sort the stack into categories first, then work through it in short sessions, scanning a category at a time so the files land in the right folder as you go. A phone scanning app that auto-crops and straightens each page speeds this up considerably and produces cleaner PDFs than a raw photo.
Resist the urge to scan a whole pile into one giant PDF. One receipt per file is far easier to name, search, attach to a specific expense line, and correct later. If you must combine, group by category and date range and note the contents, so an individual purchase can still be located inside the batch.
How long to keep them — and the paper
Keep a scanned receipt for as long as the tax authority can question the return it supports. In the US the IRS can generally look back three years, so that is the safe minimum for anything you deduct, and businesses should hold a documentary receipt for expenses above $75; some situations run longer. A backed-up folder of PDFs meets these rules with none of the bulk of paper.
Once you have a clear, backed-up scan, most tax authorities accept the digital copy as the record, which means you can usually recycle the paper original — for everyday, low-value expenses at least. For high-value items, keep the paper until you have confirmed your jurisdiction accepts digital-only records. Either way, the scan, not the fading slip, is what you will actually rely on years from now.
A plain camera or a scanning app?
A phone's ordinary camera is enough to capture a receipt, but a dedicated scanning app makes the job faster and the result cleaner. Most detect the edges of the receipt automatically, straighten and crop it, boost the contrast so faint thermal text reads, and save straight to PDF — often several receipts into separate files in one session. Some also run text recognition, so the words on the receipt become searchable later.
You do not need anything paid or fancy; the built-in document-scan feature in many phones' notes or files apps does all of this. The point is simply that an app removes the fiddly steps — cropping out the table, fixing the angle, converting to PDF — that make plain photos inconsistent. Whatever you use, the test is the same: open the finished file and confirm the four key fields are sharp.
Meals, travel and the business purpose
For some deductible categories the amount on the receipt is not enough on its own. Meals and travel, in particular, often require you to record why the expense was incurred — the client you met, the trip's purpose — not just what it cost. A scan captures the figures; the business purpose is the piece you have to add yourself.
The easiest time to capture it is at the moment of the expense, while you still remember it. Jot the reason on the paper before you scan, or add it to the file name or a note beside the PDF. Reconstructing 'what was this dinner for?' a year later, under audit, is exactly the situation a one-line note now avoids.
File, back up, and handle gaps
Create one folder per tax year and drop each scanned PDF into the year it belongs to, inside its category. Then sync that folder to a second cloud service or drive so a device failure never destroys your evidence. Aim to finish scanning a batch the same week you sort it, before receipts wander off again.
If you find a receipt for a legitimate business expense whose paper has faded to nothing, you can recreate an accurate record. Receipt Caker rebuilds the receipt for that real transaction as a clean PDF you can file with the rest — a legitimate way to restore documentation you already earned, never to invent an expense that did not happen.
Die Schritte auf einen Blick
- 1Gather and sort the paper first. Collect receipts and split them into deductible categories before you scan so filing is quick afterward.
- 2Scan in good light and full frame. Lay each receipt flat, fill the frame, and check the date, seller, and total are sharp before moving on.
- 3Save as PDF with a clear name. Export each scan to PDF named by date, seller, and amount so it sorts and searches cleanly.
- 4Note the business purpose. Add a short note of what the expense was for, since tax rules often require the reason, not just the amount.
- 5File and back up by tax year. Move each PDF into its tax-year folder and sync that folder to a second location for safekeeping.