8 min read
How to Make a Receipt in Word
A step-by-step walkthrough of making a receipt in Microsoft Word using a table, and an honest comparison with using a receipt generator instead.
- How do I make a receipt in Word?
- In Microsoft Word, type your business name and 'Receipt' at the top, insert a table with columns for description, quantity, price, and line total, then add rows below for the subtotal, tax, and total. Fill in the details and save the document as a PDF. It works, but you calculate the totals yourself; a receipt generator does the maths and layout for you if you make receipts often.
Start with a header
Open a blank Word document and begin with the information that identifies the receipt. At the top, type your business or personal name, your address and contact details, and the word 'Receipt' so its purpose is obvious. Add a line for the date and one for a receipt number, since every receipt should be dated and numbered to keep your records in order.
You can leave a space here for a logo if you want the receipt branded — insert an image and size it to sit alongside your name. Keep the header uncluttered; its only job is to say who issued the receipt and when.
Use a table for the items
The cleanest way to lay out the purchases in Word is a table. Insert one with columns for the item description, the quantity, the unit price, and the line total, then add a row for each item. A table keeps everything aligned, which is exactly where a plain typed list tends to fall apart as prices and descriptions vary in length.
Below the item rows, add rows for the subtotal, a sales tax line, and the grand total. Word can calculate these with table formulas, but many people find it simpler to type the figures in directly — which means you are responsible for getting the arithmetic right each time.
Use a built-in Word template
Before building a table from scratch, it is worth checking whether Word already has a template that fits. Depending on your version and region, the template gallery — bundled with the app or downloadable from Microsoft's site — may include receipt or invoice layouts with placeholder fields ready to fill in. Starting from one of these saves you the structural work, though the quality and availability vary.
One caveat: many of the gallery's money templates are invoices rather than receipts, and the two are not interchangeable. An invoice requests payment while a receipt confirms it, so if you adapt an invoice template you will need to change its wording and remove anything about amounts due. If no suitable template turns up, the table method below gives you full control and takes only a few minutes.
Finish and save as a PDF
Once the table is filled in, add the payment method below the total and any closing note, such as a returns policy or a thank-you. Check the numbers add up, because Word will not warn you if a total is wrong.
Then save the document as a PDF — use Save As or Export and choose PDF — rather than sending the editable Word file. A PDF fixes the layout, prints cleanly, and cannot be accidentally altered by the recipient, which is what you want for a receipt. Keep a copy for your own records, named by receipt number and date.
Making Word do the totals
If you would rather not add up the figures by hand, Word can do it for you with table formulas. In a table cell, insert a formula field and use a function such as =SUM(ABOVE) to total a column of line amounts, or reference cells the way a spreadsheet does. Set one up for the subtotal, apply your tax rate in another, and add the two for the total, and the receipt recalculates when you update the fields.
It works, but it is fiddly: the fields do not always refresh automatically, the cell references break if you insert or delete rows, and a stray formula is easy to overlook. For an occasional receipt many people find it simpler to type the figures and double-check them; for anything regular, this is precisely the manual upkeep a dedicated generator removes by doing the arithmetic for you.
Keep both the editable file and the PDF
When you are done, keep two copies. The editable document is your master — you will want it if you need to correct a mistake, reissue the receipt, or reuse the layout for the next sale — while the PDF is the fixed, tamper-resistant version you actually send to the customer. Sending the editable file instead risks the recipient altering the figures or the formatting shifting on their machine.
Name both by receipt number and date, and file them alongside your other records so a sale can be found later. That habit — one master to edit, one PDF to send, both saved in order — is what turns a document you made in Word into a proper record rather than a one-off you cannot find again.
Common issues making receipts in Word
A few problems come up again and again with the Word method. The arithmetic is the main one: unless you set up table formulas, you type the subtotal, tax, and total yourself, and Word will happily let a wrong total through. Layout drift is another — inserting a row or a longer description can push the table onto a second page or knock the columns out of alignment. And it is easy to send the editable document by mistake, letting the recipient alter the figures.
None of these is fatal, but each is a small tax on every receipt. Setting up table formulas, keeping the design simple, and always exporting to PDF before sending will avoid most of them — which is, in effect, doing by hand what a dedicated tool does automatically.
When a generator is faster
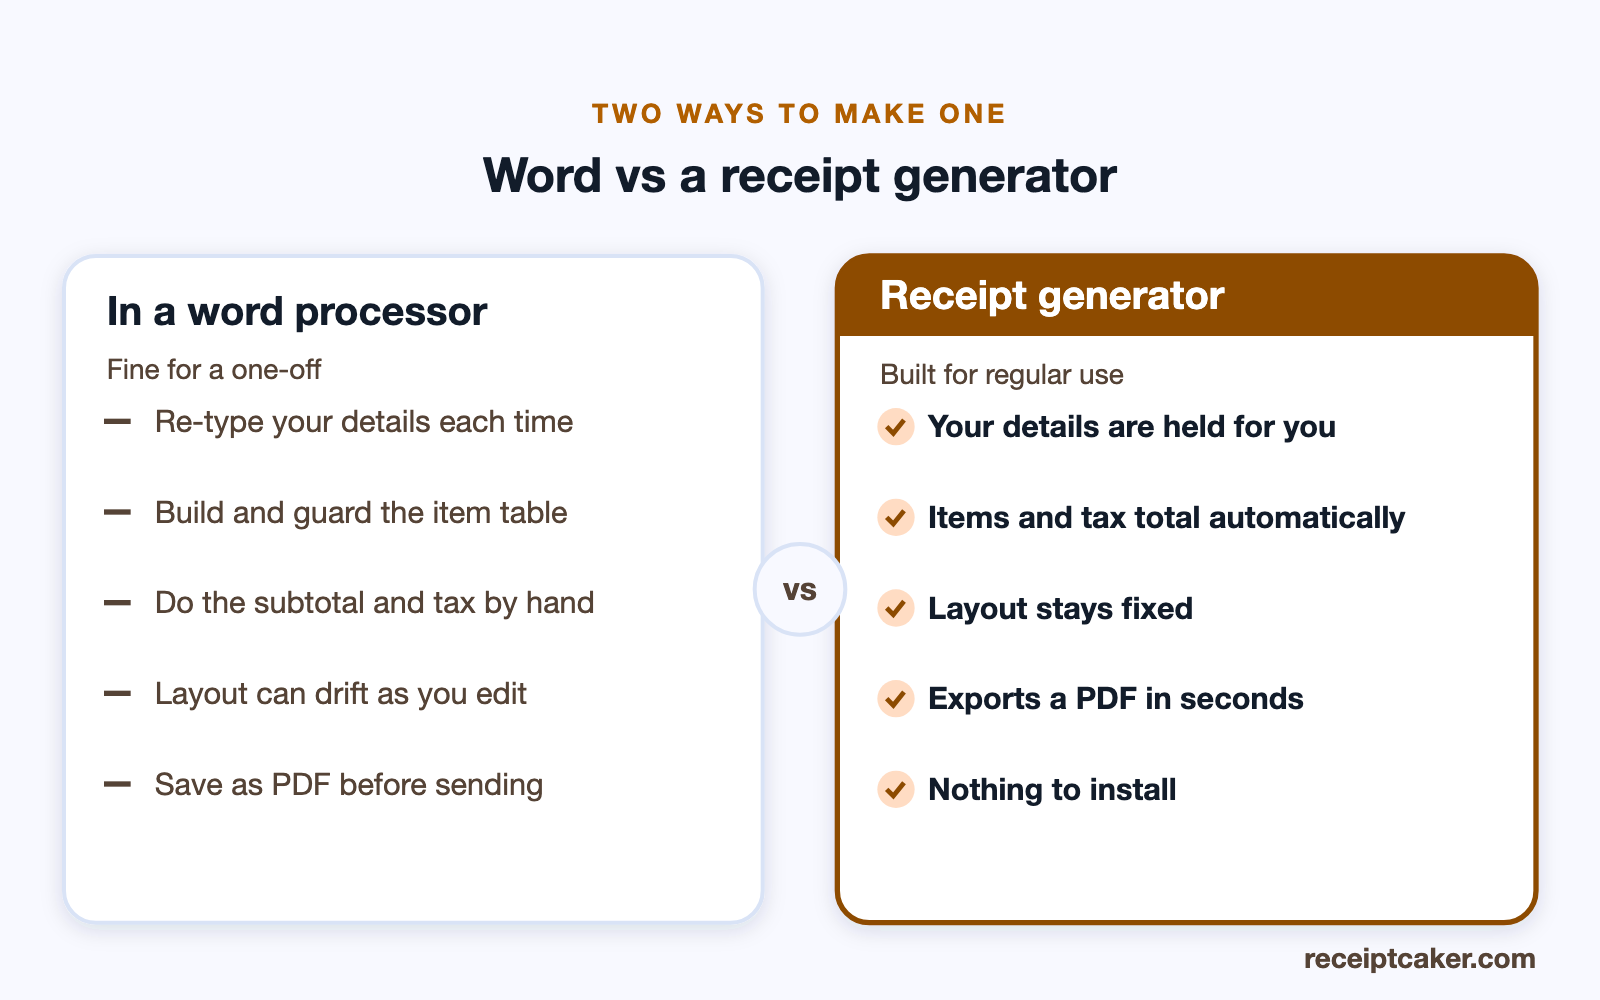
Building a receipt in Word is fine for a one-off, but it has real friction if you do it regularly: you re-type your details, rebuild or protect the table, and calculate the subtotal, tax, and total by hand every time, with no safeguard against a slip. The layout also tends to drift as you edit.
A dedicated generator removes all of that. Your details are held, the items total automatically, the tax rate is applied for you, and the layout stays fixed — you enter the sale and export a finished PDF in seconds. If you make more than the occasional receipt, it is faster and less error-prone than Word, and it needs nothing installed. Word remains a reasonable choice if you specifically want to keep everything in one document you fully control.
Steps at a glance
- 1Open a blank document. Start a new Word document, or open a receipt template if one fits.
- 2Add your header. Type your business name and contact at the top and the word Receipt.
- 3Insert a table for the items. Insert a table with columns for description, quantity, price, and line total.
- 4Add subtotal, tax, and total rows. Below the items, add rows for the subtotal, tax, and grand total.
- 5Fill in and save as PDF. Enter the details, then save or export the document as a PDF.