7 min read
How to Make Store Receipts
A guide to making store receipts — the fields a retail receipt carries, how tax and returns fit in, and the quickest way to produce a realistic one.
- How do I make a store receipt?
- Add the store name and location, list each product with its quantity and price, apply sales tax on its own line, and show the subtotal, total, and payment method with a date and transaction number. Receipt Caker's retail layout does the totals and tax for you, so you can make a realistic store receipt in a minute and export it as a PDF or image.
What a store receipt carries
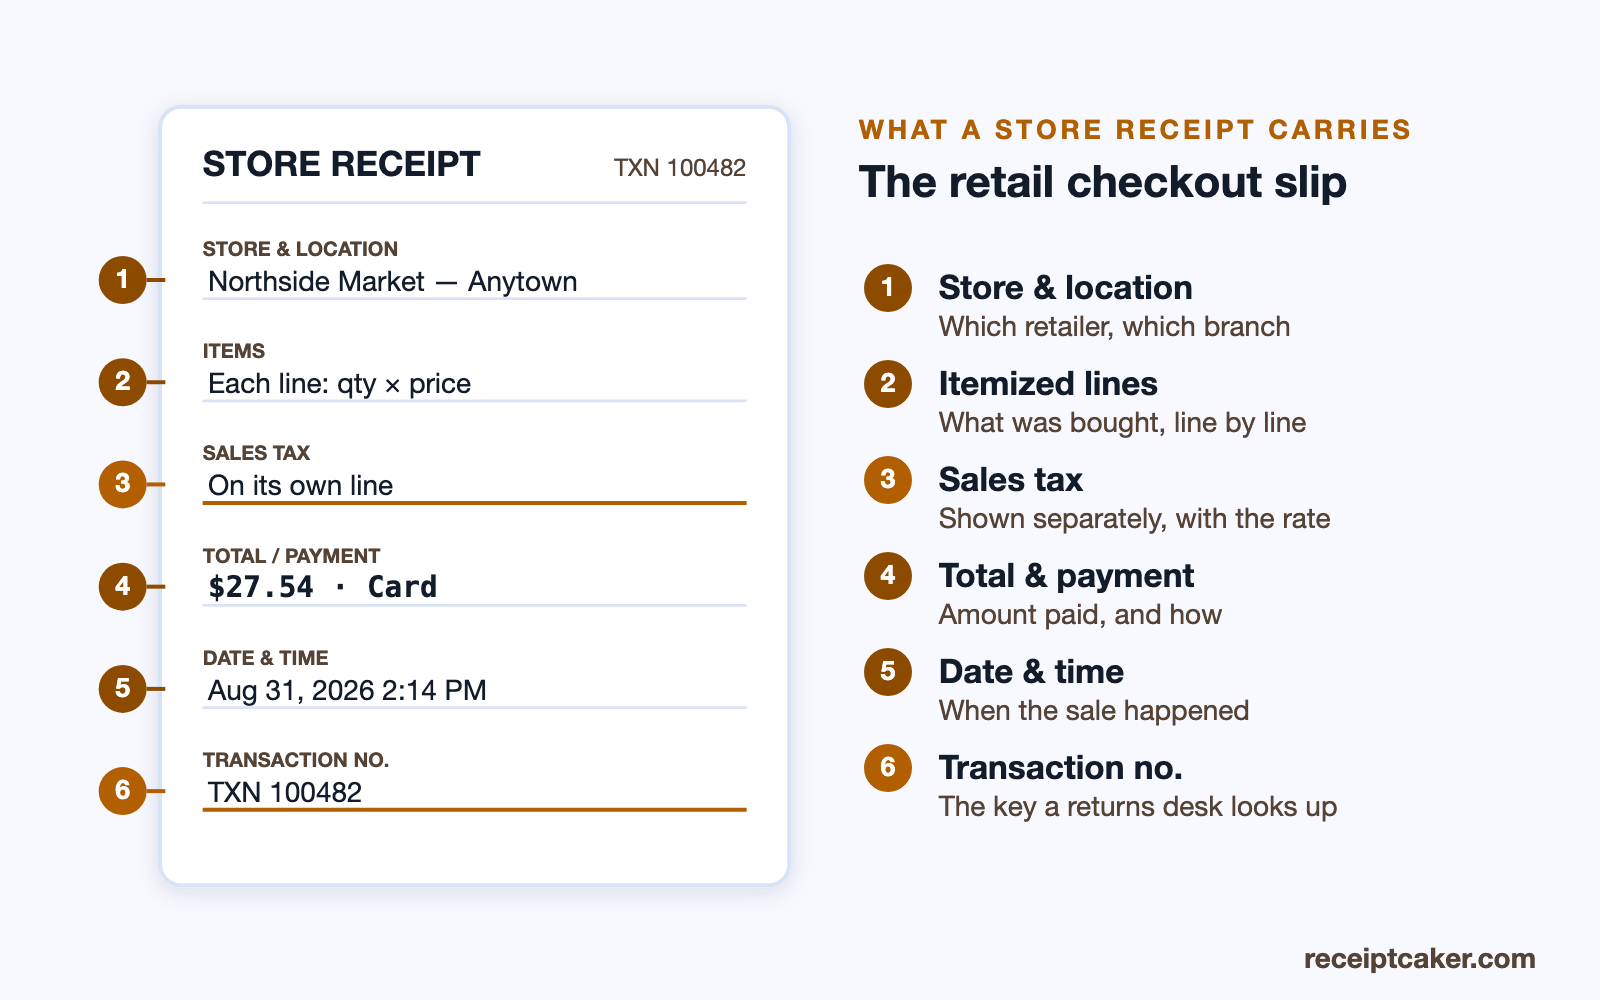
A store receipt is the checkout record a retailer gives a customer, and it follows a recognisable pattern: the store name and location at the top, then each item purchased on its own line with a quantity and price, a subtotal, a sales tax line, and the total paid. Below that sit the payment method, the date and time, and usually a transaction or receipt number.
Retail receipts often add a few extras — the cashier or register number, a barcode for returns, a loyalty note, or a returns policy printed at the foot. None of these change the core purpose: to show what was bought, for how much, and when, in a format a customer or a returns desk can read at a glance.
Store details and the transaction number
A store receipt opens by identifying the retailer: the store name, the branch or location, and often a phone number or website. That header is how a customer knows where a purchase came from and how a returns desk confirms the item belongs to them. On a multi-branch chain the specific location matters, because returns and stock are usually handled per store.
The transaction number does quiet but important work. It is the unique reference that ties the printed slip to the sale in the store's own system, so a returns desk can look the purchase up, verify it, and refund against it even if the barcode will not scan. Alongside the date and time, it is what turns a list of items into a traceable record rather than just a printout — which is exactly why a realistic store receipt includes one.
Itemizing the purchase
The heart of a store receipt is the itemized list. Each product gets its own line with a quantity and a unit price, which lets the customer check what they were charged and lets a returns desk process a single item without unpicking the whole sale. A lump-sum total tells you how much was spent but not what on, which is exactly the information returns, warranties, and expense claims need.
List the items in the order they were rung up, keep the descriptions specific, and let the subtotal build from the lines. Receipt Caker totals the items as you add them, so the subtotal always matches the lines above it. On a long grocery or hardware receipt that can run to dozens of lines, and itemising each one is what lets a customer query a single overcharge, or return one product, without unpicking the whole basket.
Tax, totals, and returns
Sales tax on a store receipt sits on its own line, labelled with the rate, between the subtotal and the total — most jurisdictions expect it itemised rather than buried in the prices. The rate depends on the store's location, since US rates combine state and local portions. The total is simply the subtotal plus the tax. Where a store sells a mix of taxable and exempt goods — common in groceries, where staples are often untaxed but household items are not — the tax line is worked out on just the taxable items.
A clear receipt also underpins returns: the itemized lines, the date, and the transaction number are what a returns desk uses to verify a purchase and refund the right amount. That is why a realistic store receipt shows all three, and why reconstructing a lost one accurately matters if you need to return a genuine purchase.
Store receipts, expenses and tax
For most people a store receipt's job ends at the returns desk, but for anyone claiming an expense it does more. An itemized store receipt is what backs up a business purchase on an expense report or a tax deduction: it shows what was bought, that it was a legitimate cost rather than a lump sum, and how much of the total was tax. A card statement alone rarely satisfies that, because it shows the amount but not the items.
That is why keeping the itemized slip matters. In the US the IRS does not require a documentary receipt for expenses under $75, but keeping one above that is expected, and records generally need to be held for three years since that is how far back the IRS can look. Because thermal slips fade, capturing a store receipt as a digital copy is the reliable way to still have a legible record when a claim or an audit asks for it.
Paper slips and e-receipts
Most store receipts still print on thermal paper, which is cheap and instant but fades within months as the heat-sensitive coating breaks down — the reason a saved receipt so often turns out blank exactly when you need it for a return. Increasingly, checkouts also offer to email or text the receipt, and that digital copy solves the fading problem while carrying the same fields.
If a store receipt matters to you — for a warranty, a return window, or an expense claim — the digital version is the safer one to keep, or you can photograph the paper slip to a PDF before it fades. Either way the content is identical to the printed slip; only its durability changes.
Making a realistic store receipt
A retail receipt layout has a lot of small fields, which is tedious to lay out by hand in a document. A generator with a retail template arranges them for you — you enter the store, the items, and the rate, and it produces a receipt that reads like a genuine checkout slip.
This is useful for a range of honest purposes: recreating a receipt you lost for a real purchase, generating sample data to test a point-of-sale or expense app, or producing a mockup for a design. Fill in the fields, export a PDF or image, and you have a clean store receipt. Because it is generated in your browser, nothing you enter is uploaded — and it should only ever document a real sale, never one invented to deceive.
Steps at a glance
- 1Add the store details. Put the store name, location, and contact at the top.
- 2List the items. Add each product on its own line with quantity and price.
- 3Apply tax. Show sales tax on its own line with the rate applied.
- 4Total and add payment. Show the subtotal, tax, and total, and note how the customer paid.
- 5Date and number it. Add the date, time, and a transaction number, then export.